Chameleon version 2 Tutorial
Welcome to the Chameleon version 2 tutorial. The 12 steps in this tutorial take approximately 15-20 minutes to complete.
We've prepared an optional video to accompany this tutorial:
15 minutes, 60 MB (please allow a few minutes for video to start playing).
In this step you'll see the new Chameleon Activation process.
We now require you to select a Theme and Widget set in advance (to prevent the initial shock of seeing a COMPLETELY blank page on first view). But FEAR NOT! Unlike real life, CHameleon allows you to change your mind (and your theme and widget set) at any time!
a) You must be form certified to design Chameleon views
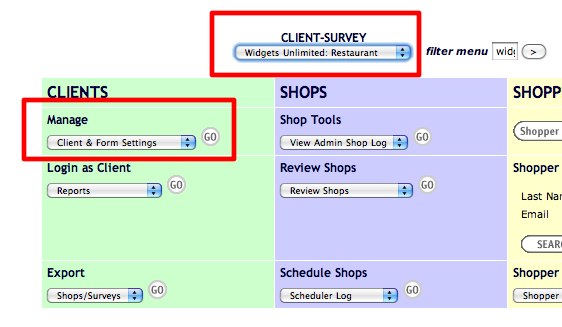
b) Go to your account on the STAGING server (typically if your company was named "Service Universe", and your live production server account was located at
"http://sassieshop.com2serviceu" or "http://www.serviceuniversesystems.com"
... your staging server account would be located at
"http://stage.sassieshop.com/2serviceu" or "http://stage.serviceuniversesystems.com"
c) Select a survey that does not have Chameleon turned on (preferably a survey with many sections and a client with many levels)
d) Choose MANAGE: Client & Form Settings
e) Select Configure Chameleon
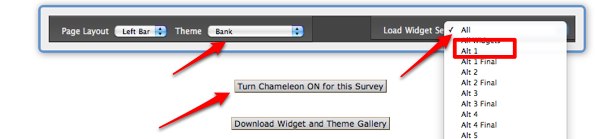
f) Select any theme and any widget set ( "PRESET 1" or "Alt1" is a good choice) and Turn Chameleon ON
g) You should see a Basic Shop view with a few Widgets in place. This is the new design view!
Yes it looks almost exactly like the actual shop view (in fact, Chameleon makes an attempt to pull up real shop & location data for that client), but DO NOT BE FOOLED! It's not a real shop, so some functions inside the widgets like printing don't actually work.

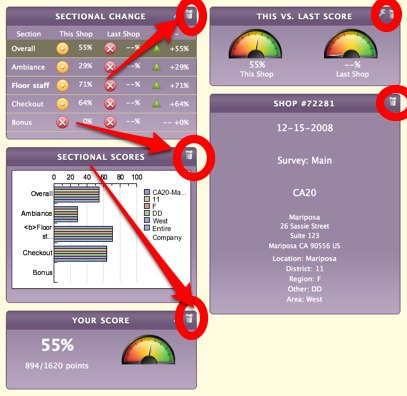
In this step, you'll see how easy it is to delete widgets. It's so easy that the beta testers were insulted that we tested them on this (not that this keeps us from insulting YOU, too).
Delete all of the widgets in the BODY of the shop by clicking on the trash icon icon in the top right of the widgets (note: do NOT delete the widgets in the sidebar - you'll need those for later).
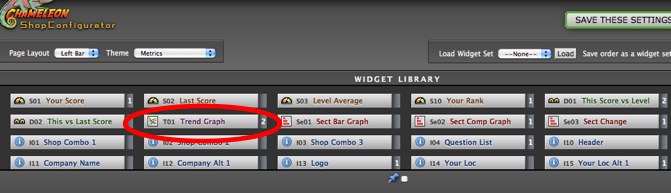
In this step you'll discover the cleverly hidden "WIdget LIbrary Drawer". Remember how the little girl found an entire world of magic and wonder in the wardrobe in "The Lion, The Witch and the Wardrobe?". It's exactly like that, just without the Turkish Delight ... or the centaurs .. or Tilda Swinton.
To see the Widget Library (where you select widgets to drag and drop into the display)., click on the double arrowsin the black bar at the top of the window.
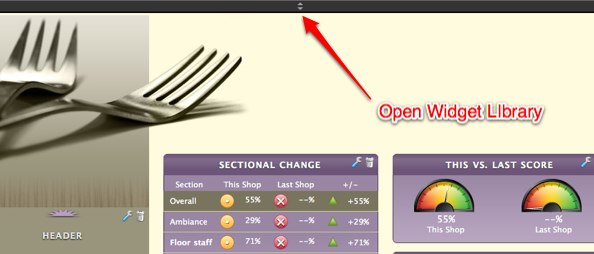
Here are the main features of the WIdget LIbrary:
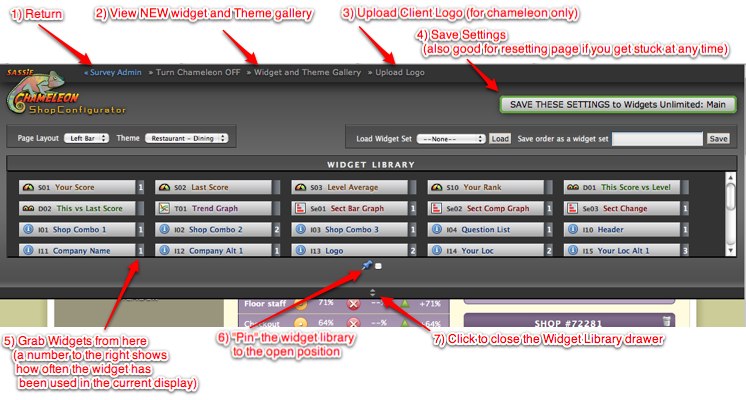
In this step you'll see our newly designed WIdget Library. It's organized by category (Single score, double score, trending, sectional, sidebar info, and controls) and labeled with the kind of cute little icons that make sense to no one except us.
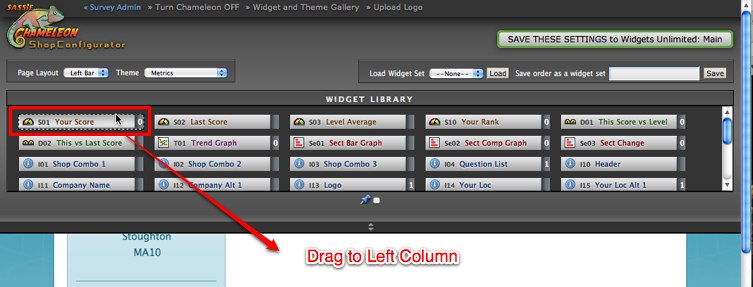
- Add the Your Score widget (ID# S01) to the body of the display:
You may have noticed that there are actually fewer FEWER widgets than before. But like the Spartans at Thermopylae, it's not the quantity but the quality that counts. Instead of dozens of widget variations, there are now HUNDREDS because virtually every Version 2 Widget is CONFIGURABLE.
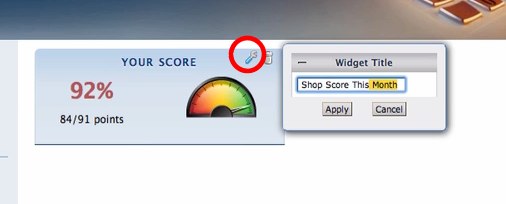
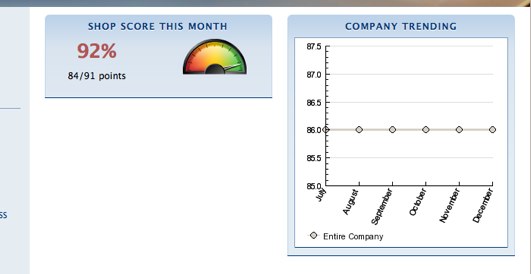
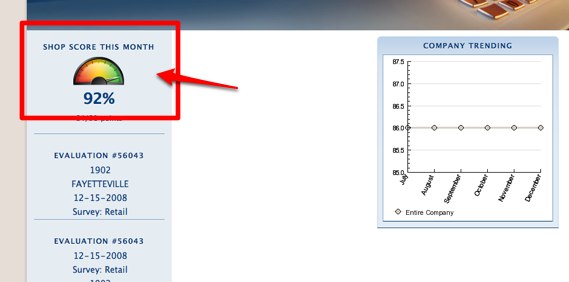
To begin to experience the fearsome configurability of the version 2 widgets, let's rename the widget title from "Your Score" to "Shop Score This Month"
- Click the "Wrench" icon - this gives you access to the editable configurations for each widget.
- When the title field is blank, it will apply the default title to the widget. Type in "Shop Score This Month" and click Apply.
In this next step, you'll see how we've sneakily combined the various trending graph widgets (Trend vs. Company, Trend vs. 1 Level, Trend vs. 2 Levels), etc) into ONE configurable widget, the mighty Trend Graph widget.
Our goal for this exercise is to make a widget that ONLY shows the trending for the entire company.
- Drag the Trend Graph icon to the body of the report.
- Click the wrench icon and UN-check everything except Company
- The default name will change to reflect your selection, but if you want to change the name to something else, click the + icon next to Widget Title and change the name to your liking
- Click Apply and see the widget change immediately.
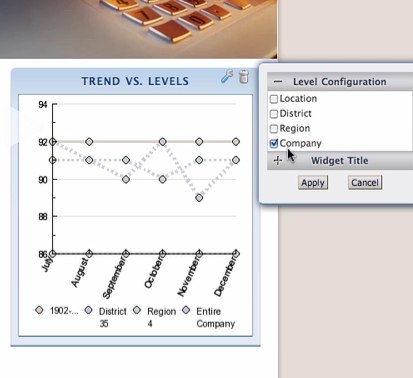
- You should end up with a widget that looks somewhat like the widget below (well, the one below on the RIGHT ... if you somehow got the Trending widget to look like the one below on the LEFT, you seriously should STOP reading this tutorial and START opening for Siegfried and Roy in Vegas).
Olive Garden has "Never Ending Breadsticks".
Chameleon has "Never Ending Widgets".
No contest!

Version 2 Widgets can be used over and over again!
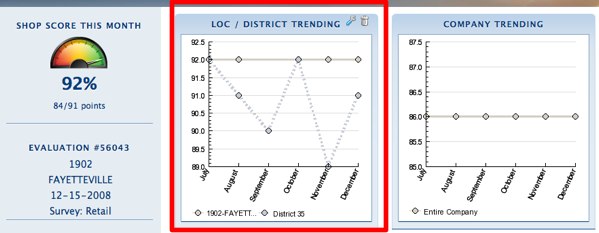
In this example you'll drag ANOTHER Trend Graph widget and configure it differently.
- Drag another trending graph into shop view.
- Repeating the steps in Step 6, except this time leave the Location and District boxes checked
- You now have a line graph with two lines (one for Location, One for District)
OK, this next step is really just us showing off "Stupid Chameleon Tricks". In other words, you can pretty much put any regular widget in the sidebar .. or any sidebar widget in the body. The "Your Score" widget works particularly well in the sidebar.
Move the Shop Score into the top of the sidebar so it looks like this:
Location Widget? District Widget? Company Widget?
This Period? Year To Date?
To quote the classic badly-translated video game: "ALL YOUR BASE ARE BELONG TO US!"
Let's take a Company Rank widget for YTD and turn it into a DISTRICT Rank widget for THIS PERIOD.
- Drop in a YOUR RANK widget
- Click the wrench icon and change the Company selection to District
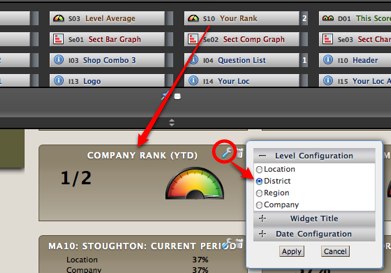
- Click the + icon next to Date Configuration and select "Current Period".

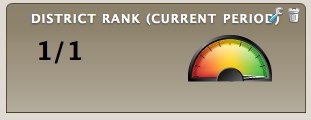
- You now have the following District Rank widget
One CRUCIAL step to designing Chameleon views is remembering to save your work (Chameleon will actually warn you if you try to leave this page without saving!).
In fact, if you ask one of your coworkers to log in and view what your work in progress and you haven't saved, they'll think you're COMPLETELY HALLUCINATING because none of your changes will be visible to them. So save yourself a trip to rehab and follow these steps:
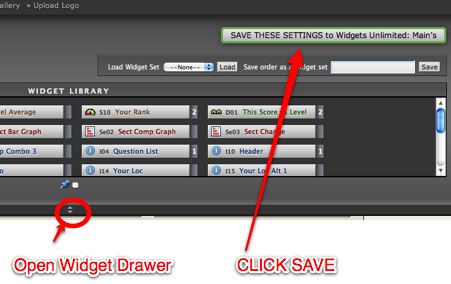
- Open the Widget Drawer again
- Click the Save Button
- Wait
- Keep Waiting
- Wait Some More (have you ever seen a FAST chameleon?)
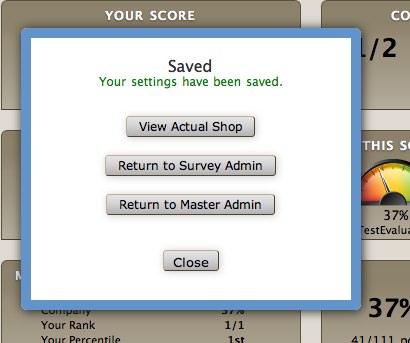
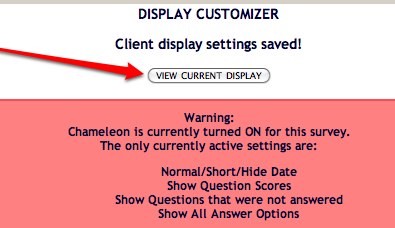
- When you see the following box, Click "View Actual Shop"to see
an actual shop with a URL you can copy and send to someone else (you may
need to open the address bar / location bar / tool bar to see the address)
In this step we are outsmarting those location employees who try to identify the mystery shopper by the date on the shop view. We do this by removing the DAY from the date display for all shop views for this client (regular view AND chameleon view).
a) If you don't have any widgets that display a date, add one of the 3 Shop Combo widgets to the sidebar.
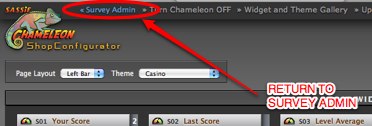
b) Leave the Chameleon page and return to the Survey AdminPage
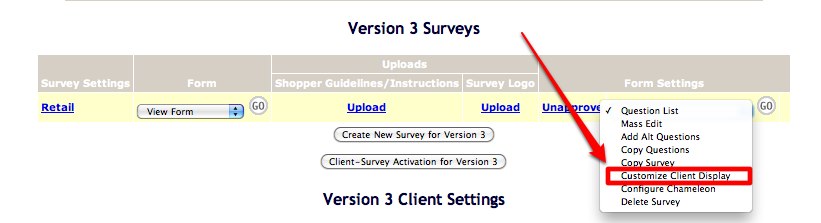
c) On the Survey Admin page, select "Customize Client Display"
d) Select "Short Date" & Save Changes (at bottom)
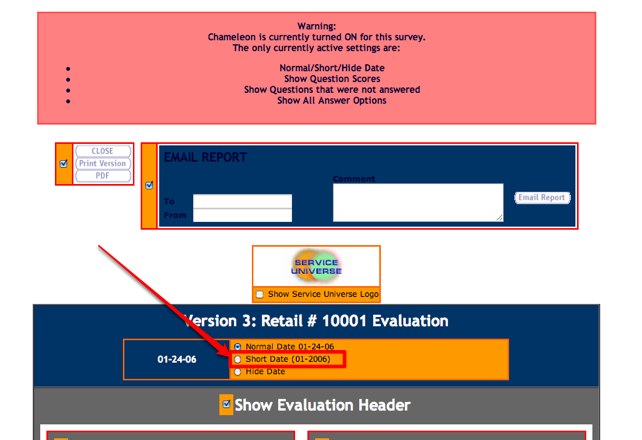
e) Bonus Settings! At the bottom of this page are 3 other settings that work in Chameleon as well:
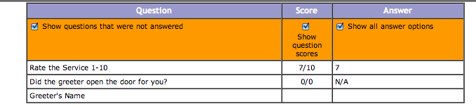
- Show/Hide questions that were not answered
- Show/Hide question scores
- Show all answer options (you'll see this in action on the next step)
f) Click View Current Display
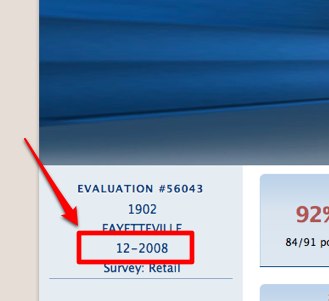
g) Verify that the DAY has been removed from the Date Display
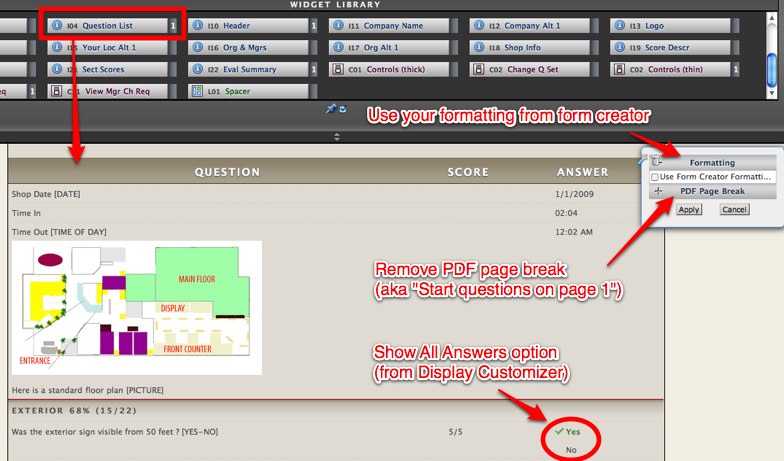
The Survey Questions and Answers are a widget, too!
- Drag the Question List widget (#I04) to the very bottom of your display
- Configurable Option #1: If you have special formatting from when you created the survey the form creator, you can override the Chameleon styling for those questions (note: any question with no formatting changes will still have Chameleon styling)
- Configurable Option #2: If you don't like the white space at the bottom of the first page of the PDF view, you can remove the PDF Break
- Bonus: The Show All Answers option from the Display Customizer lets the viewer see ALL of the available answers for that question, as opposed to ONLY seeing the selected answer.
Congratulations! You've survived your first experience with Chameleon Version 2!